Installing Debian stable on the MK802
The mk802 is a mini PC stick that originally comes with Android installed. It is based on the Allwinner A10 SOC which is pretty common in all kinds of Android devices, especially tablets. As an ARM-based system, it has low power requirements and its price/performance tag makes it an interesting device for modding. The following steps describe how to create a bootable micro SD card with Debian stable (Ubuntu 12.10 was used here, other Ubuntu versions or Debian should work similarly).
|
Caution
|
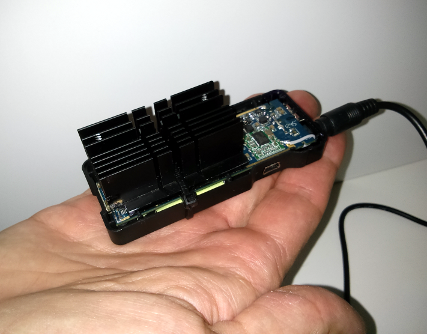
If you plan to "abuse" the mk802 as a server, it will probably operate at full load for longer periods and get very hot. I recommend to mount a heatsink to avoid trouble. You have been warned. |
Install some packages you will need on the build machine
This will mainly be necessary to cross-compile the kernel and bootloader. (To minimize the sudo’ing, it might be easier to become root first).
# apt-get install qemu-user-static binfmt-support binutils-arm-linux-gnueabihf gcc-4.7-arm-linux-gnueabihf-base \
 g++-4.7-arm-linux-gnueabihf gcc-arm-linux-gnueabihf cpp-arm-linux-gnueabihf libusb-1.0-0 libusb-1.0-0-dev git \
wget fakeroot kernel-package zlib1g-dev libncurses5-dev debootstrap
Create a build directory and the root FS image
We will make a 1 GB root FS, which is enough for a minimal system, adjust if you plan to preinstall more software.
# mkdir allwinner
# cd allwinner
# mkdir debfs_armhf
# dd if=/dev/zero of=debfs_armhf.img bs=1M count=1024
# mkfs.ext4 -F debfs_armhf.img
# mount -o loop debfs_armhf.img debfs_armhf
Next, we will install the Debian minbase inside the image:
# debootstrap --verbose --arch armhf --variant=minbase --foreign stable debfs_armhf http://ftp.debian.org/debian
Now we are ready to chroot to the image and start the second stage of debootstrap
# cp /usr/bin/qemu-arm-static debfs_armhf/usr/bin/
# mkdir debfs_armhf/dev/pts
# mount -t devpts devpts debfs_armhf/dev/pts
# mount -t proc proc debfs_armhf/proc
# chroot debfs_armhf/
# /debootstrap/debootstrap --second-stage
Let’s set the apt sources and install some essential stuff:
# echo "deb http://ftp.debian.org/debian/ wheezy main contrib non-free" > /etc/apt/sources.list
# echo "deb-src http://ftp.debian.org/debian/ wheezy main contrib non-free" >> /etc/apt/sources.list
# apt-get update
# apt-get install vim ntp udev netbase ifupdown iproute openssh-server iputils-ping net-tools wget ntpdate less \
console-tools module-init-tools apt-utils dialog locales isc-dhcp-client wireless-tools wpasupplicant man-db
Don’t forget to set the root password
# passwd root
Create a new /etc/fstab, which should look something like this:
# /etc/fstab: static file system information.
#
# <file system> <mount point>   <type>  <options>       <dump>  <pass>
/dev/root      /               ext4    noatime,errors=remount-ro 0 1
tmpfs          /tmp            tmpfs   defaults          0       0
It is also a good idea to setup your wireless at this point in case you want to login with ssh. A typical WPA/WPA2 configuration with static IP address would require an /etc/interfaces like this:
auto lo
iface lo inet loopback

auto wlan0
iface wlan0 inet static
        wpa-ssid "YOUR_SSID HERE"
        wpa-key-mgmt WPA-PSK
        wpa-group TKIP CCMP
        wpa-psk "YOUR_PRESHARED_KEY_HERE"
        address 192.168.1.1
        netmask 255.255.255.0
        gateway 192.168.1.254
You can make further adjustments at this point if you like (e.g. configure name servers, locale, timezone etc. etc). Once you’re finished, leave the chroot environment with <ctrl-d> and create a tarball of the newly created root filesystem:
# cd debfs_armhf
# tar -cvz * -f ../mk802rootfs.tgz
Compile the kernel and bootloader and install everything to SD card
The easiest way is to use sunxi-bsp (BSP stands for board support pack). You can checkout the build tree via git:
# git clone --recursive git://github.com/linux-sunxi/sunxi-bsp.git
An update of the sub-repositories at a later time can be done like this:
# cd sunxi-bsp/allwinner-tools
# git pull git://github.com/linux-sunxi/allwinner-tools.git
# cd ../cedarx-libs
# git pull git://github.com/linux-sunxi/cedarx-libs.git
# cd ../linux-sunxi/
# git pull git://github.com/linux-sunxi/linux-sunxi.git
# cd ../sunxi-boards/
# git pull git://github.com/linux-sunxi/sunxi-boards.git
# cd ../sunxi-tools/
# git pull git://github.com/linux-sunxi/sunxi-tools.git
# cd ../u-boot-sunxi/
# git pull git://github.com/linux-sunxi/u-boot-sunxi.git
# cd ..
Run ./configure to see which boards are currently supported. I bought the 1 GB version of the mk802, so let’s configure that:
# ./configure mk802-1gb
A simple # ./configure will give you a full list of supported boards.
At this point, you can customize the kernel configuration if you like:
# cd linux-sunxi
# make linux-config
# cd ..
Now we are ready to start the build process:
# make
If everything worked out fine, we have created the hwpack under sunxi-bsp/output/mk802-1gb_hwpack.tar.xz, so we are ready to write everything to SD card (which is /dev/sdb in my example):
# scripts/sunxi-media-create.sh /dev/sdb sunxi-bsp/output/mk802-1gb_hwpack.tar.xz mk802rootfs.tgz
|
Note
|
I found that the script will fail if you have a really slow SD card. Changing the "sleep 1" in line 88 to "sleep 3" may help in this case. |
Ready to boot? OK, put the SD card into the mk802, plug in the power supply and cross your fingers. ;)
An update of the hwpack + kernel without overwriting the root FS can be done with this command:
# scripts/sunxi-media-create.sh /dev/sdb sunxi-bsp/output/mk802-1gb_hwpack.tar.xz norootfs